Please Note:

Unless otherwise stated, all pictures included in this blog were taken my me. Please do not copy or use them in anyway without my permission. If you would like to use any of my pictures please email me at cheekiemonkeyphotography@gmail.com

Feel free to post my images to Pinterest but please make sure to link back to my site. Thanks!
Showing posts with label school. Show all posts

Sunday, October 21, 2012

Composition

One of our recent assignments in my Intermediate Photography class was Composition. Basically composition is the foundation for any good photograph. You need to be aware of how you are composing your photo. There are tons of "rules" for composition. Actually they are more like guidelines. You can always start with the basic rules and if you don't like your picture you throw out the rules and compose your picture in the way that makes for the best picture. 
Some of the basic rules are:

1. Rule of Thirds this means while you are looking through the view finder - mentally put a grid on it. Two vertical lines and two horizontal lines. Put your subject or object of interest (SOI) in one of the intersections of these lines. It puts your SOI  off centered which creates a more appealing picture than just sticking it straight in the middle.

2. Framing. With framing you "frame" your SOI with something in the picture. A doorway, trees, a window, etc. It helps to automatically draw your eye into your SOI. With these pictures I used the tree branches to frame my kids. 


3. Fill the frame. Fill your viewfinder with your SOI. Why have other stuff competing for attention with your SOI.
4. Depth of Field.  This goes kind of with Fill the Frame (at least in my opinion)  Use a large aperture (small F-stop number) to blur out the background. Again why have other stuff competing for attention with your SOI. If you can't get it out of the frame at least make it blurry. Your mind will pretty much disregard the blurry stuff and be drawn to your SOI which is in focus.

5. Contrast Use dark and light contrasts to draw the attention to your subject. Your eye will be drawn to the contrast. 
The photo above combines quite a few of the composition "rules" including some I haven't mentioned yet. 
Rule of thirds, contrast, framing, and leading lines.

When you train your mind to look at the world through the composition "rules" you start to see them everywhere. You also train yourself to take better pictures. Also remember there are times to throw them all out. You may find you love that picture best of all. 

I would love to see your pictures of composition. 


Saturday, October 20, 2012

Night Photography


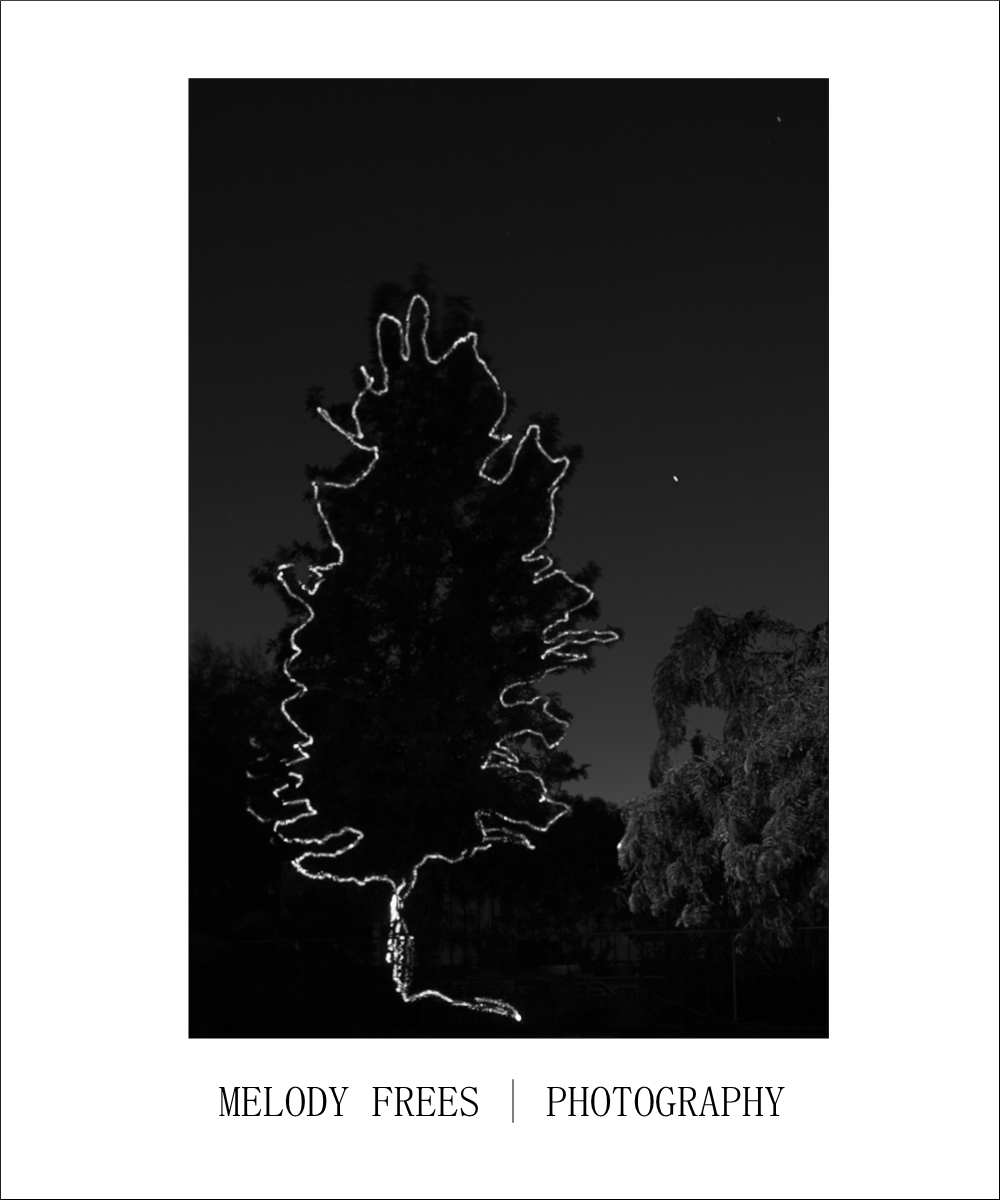
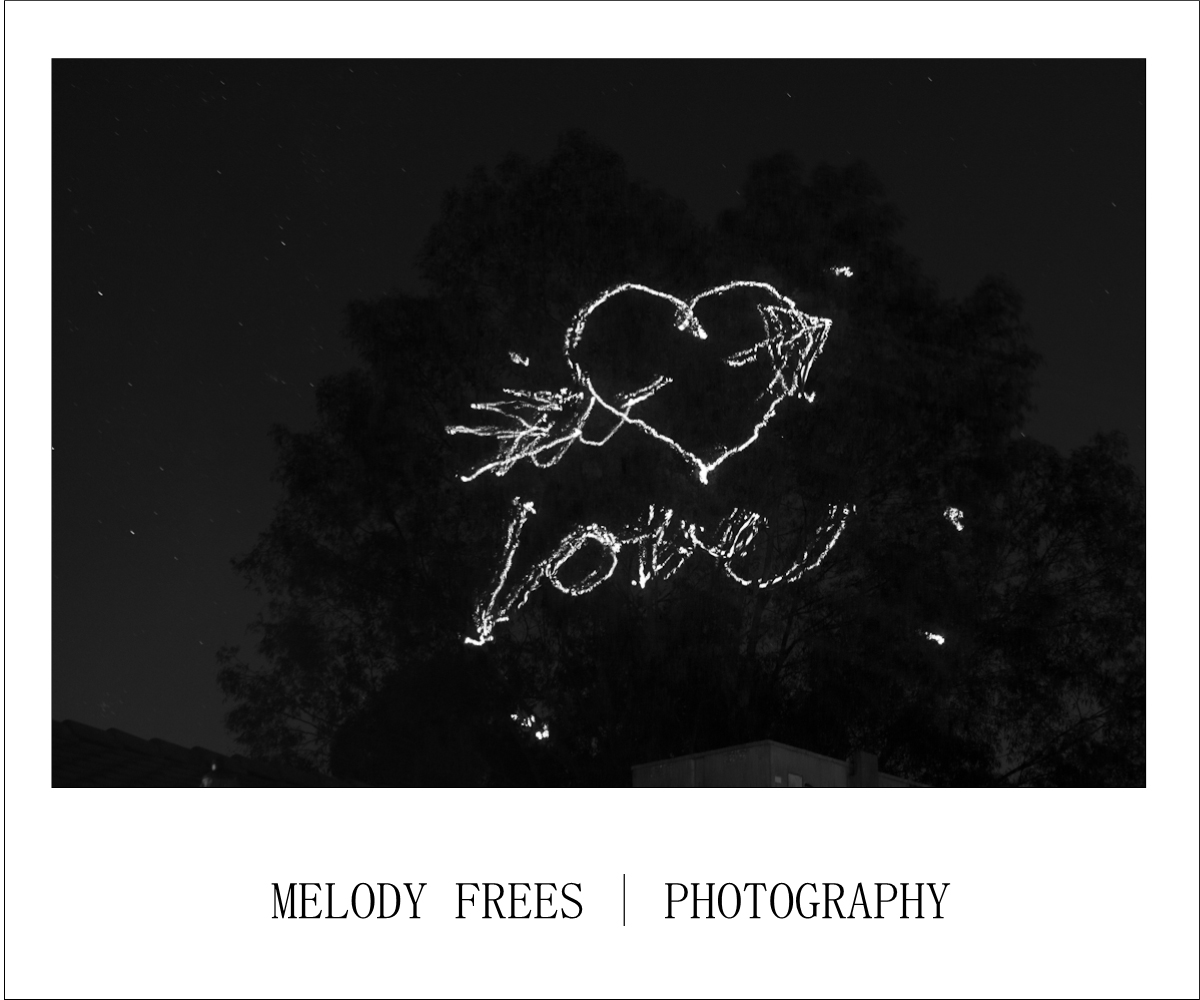
For my Intermediate Photography class our most recent project was Night Photography. I've never done much Night Photography. I've done some - like when I took pictures of fireworks on the fourth of July. But overall it isn't something I've played around with much. I had  a lot of fun with it. It does take some time and patience. For most of these pictures I had the shutter opened for 30 seconds. Which doesn't sound like a lot but when you're taking a picture it seems like FOREVER. Plus you have to wait for at least 30 seconds after the picture is taken for the camera to process the image. For someone (we aren't going to name names me) who doesn't have a lot of patience this is almost an enternity. That being said, I think these pictures were worth it.

Key Tips when taking night photography:

1. USE A TRIPOD!! This is a must. Because the shutter is open so long any (and I do mean ANY) movement causes blur and camera shake.

(This airplane is heading to the Air Force Base. I love how it turns in the picture)


(These two pictures are airplanes headed to the airport. Their flight paths are more straight.)

2. TAKE YOUR TIME. Set up the camera and the tripod and get your shot ready before you press the shutter. If you are taking pictures of airplane trails (above) make sure you are in a flight path. We live near an Air Force Base and a major airport so we saw quite a few airplanes. The ones going to the airport were more frequent than the ones going to the Air Force Base. The problem was the ones going to the Air Force Base were a lot closer plus they turned which was awesome. But I missed most of them because I wasn't ready for the shot. I got quite a few of the ones going to the airport but they weren't as exciting.
(This picture was done with a flashlight. Hubby is standing in the street - very empty street - SAFETY FIRST! - he is aiming the flashlight at the camera)

(This is in the car on the freeway. Shutter open for 30 seconds.)

3. USE A LOW ISO. I used 100 or 200 most of the time. You're probably saying "WHAT?! ISO 100 at night? That's crazy" The key here is the shutter is opened so long it lets in a lot of light. Start with 100 and if your picture is too dark move up to 200. I did some at 800 and they work fine but you are already going to get a lot of noise in the picture because the shutter is open so long that you don't want to add to it with a high ISO.


(These are done with a laser pointer. Hubby was sitting next to me with the laser pointer aimed at the tree. He had to "paint" on the tree or else you wouldn't be able to see the light since it wouldn't have anything to reflect off of)

4. USE AN ASSISTANT. This isn't a requirement but it does make it more fun. Plus you get the added benefit of their ideas. My hubby is always willing to be my assistant which is awesome for me. (partially because then I get to spend more time with him. But also because he has a great eye for art so his input is always helpful.) He is my model for a lot of the pictures. He's also the one who is using the laser to "draw" in the pictures. We used a really powerful laser pointer for these pictures but you can also use a flash light.


Additional Tips When using a laser pointer be careful to never shine in peoples eyes, windows, etc. Also make sure you don't shine it at airplanes (HUGE NO!NO!) Most laser pointers aren't powerful enough to reach airplanes but some are and it is a Federal Law that you can't shine them at airplanes. (You wouldn't want to be the one to cause a plane crash or permanent eye damage.)
When using a laser pointer - stand on same side as the camera and "paint" away from the camera. If you spell words spell them frontwards.
When using a flash light - stand opposite the camera and "paint" towards the camera. If you are spelling words, spell them backwords.

Have fun with it!! I'd love to see what pictures you create!


Tuesday, February 14, 2012

Airplane and Blossoms

School started again yesterday so I'm going to be a lot busier for a little while. I'm really excited about this class. It is a B&W film class. I discovered yesterday that I LOVE the smell of the dark room. It is such an awesome smell. (Call me crazy lol)

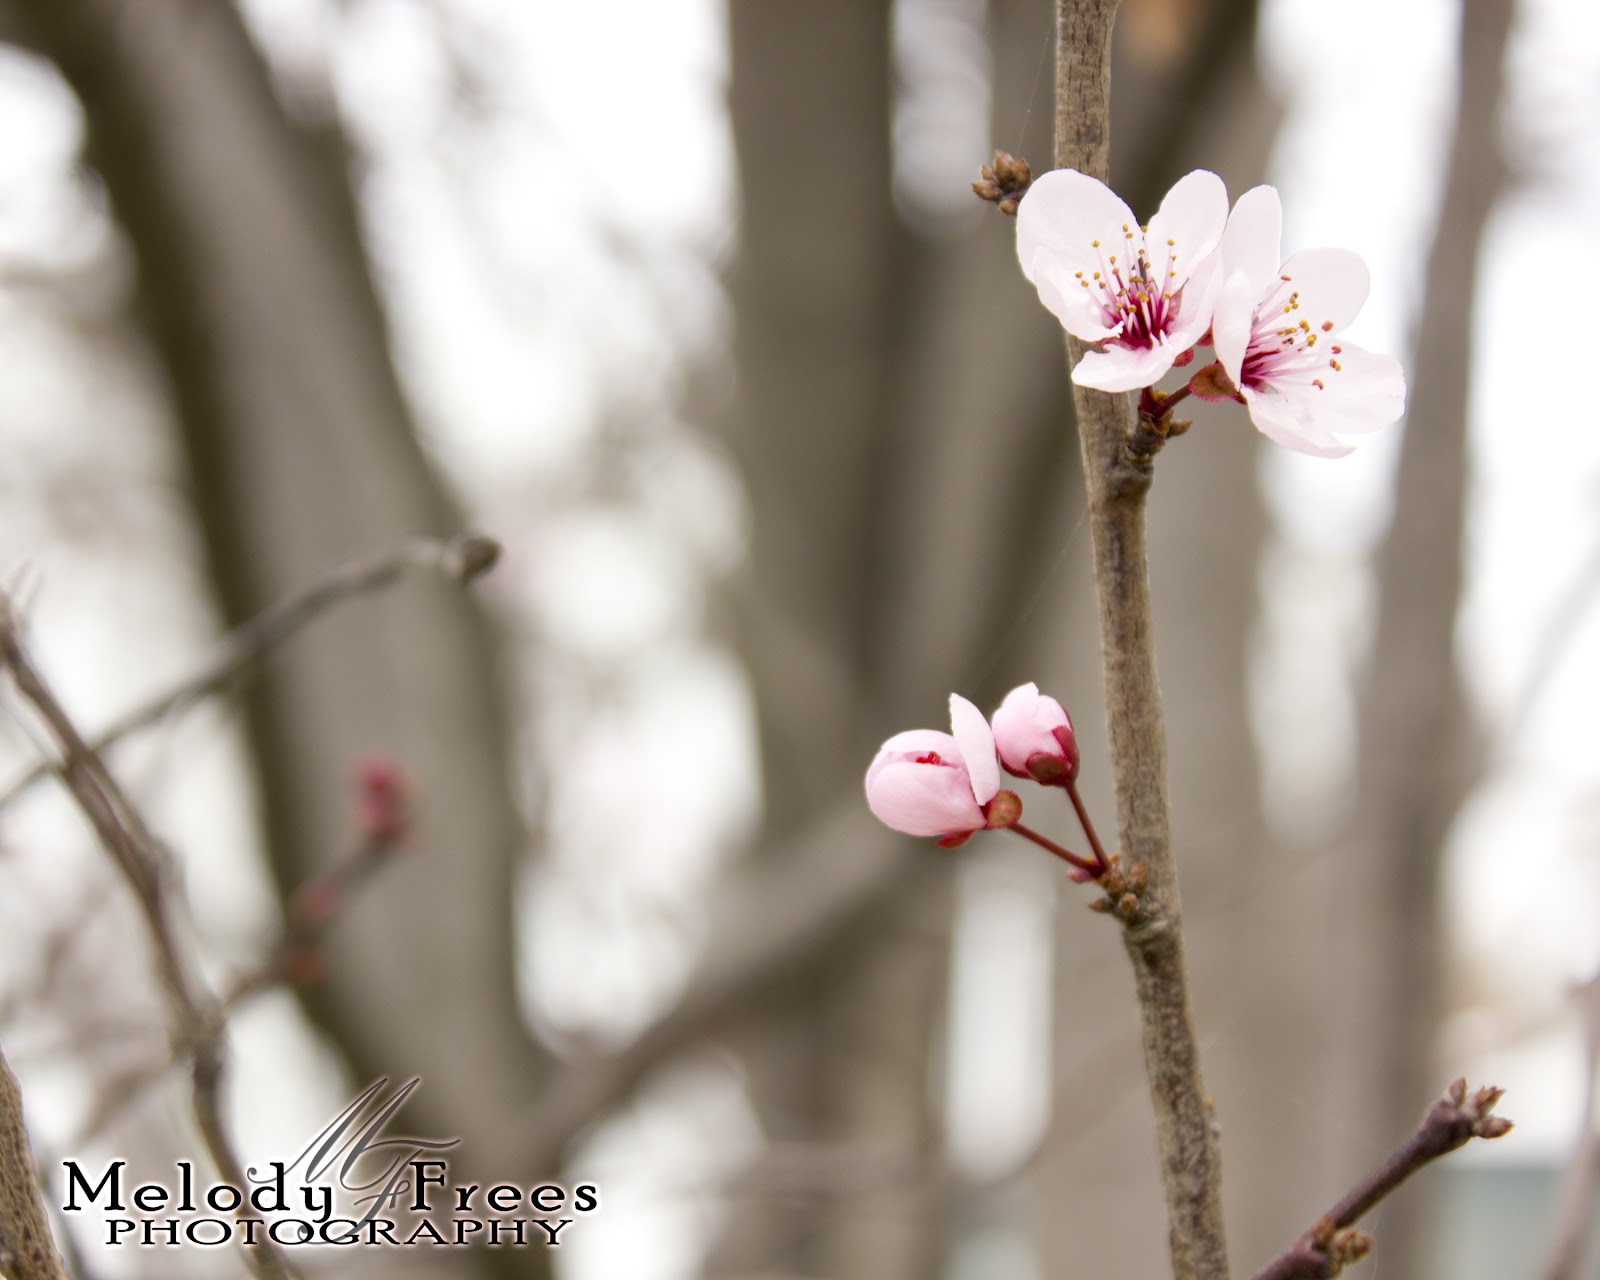
 As I was walking around the parking lot while on a break from class I saw this tree with these beautiful blossoms. I want to say they are cherry blossoms but I could be wrong. I just know that they were gorgeous and I had to go back with my camera and get some pictures of them.

So after class ended I grabbed my camera and went back to get some pictures. I really love how they turned out.


 I think this one is my favorite.

While I was driving to pick up the twins I saw these huge airplanes flying in circles around March Air Force Base. They would take off, fly in a large circle and land again. Over and Over. It was AWESOME. I was so afraid that I wouldn't be able to get a picture of them. Luckily they kept doing it for quite a while and I was able to pull into a parking lot near by and switch out to my new 75-300mm lens. (Thank you hubby for my wonderful Valentines day gift!! I LOVE IT!!) These were some of my favorite shots. I have learned that these planes are C-17s. Boeing C-17 Globemaster_III. It was so cool to watch them. They really are beautiful planes.


Friday, November 4, 2011

More School Projects

Project: Depth of Field. You had to take one picture that demonstrates shallow depth of field(only the main subject in sharp focus) and one that demonstrates deep depth of field (the main subject and everything else in sharp focus as well)
Critique:
Grade: A
Images have strong impact
Instructor's Comments: Melody - What a crack up! Usually I warn against mixed lighting (sun & shadow) but somehow you made it work. Clever use of a high ISO to stay inside the camera-stability zone and ward off camera shake. Congrats!!


Project: Motion (Submit two photos in one document of the same or different subjects: One that demonstrates "stop- Action" with a fast shutter speed and One that demonstrates "motion Blur" with a slow shutter speed)
Grade: A-
Stop Action image has moderate impact
Blur image has moderate impact
Instructor's Comments:
Melody - Generally a good project; you did a lot of things right. A couple of comments: your runners aren't in precise focus in the first shot (tough to achieve when they're coming right at you). Also, I think a lower camera angle would help emphasize the running motion. And although it was smart to switch ISO speeds, you ended up with exposures that were slightly different. All in all, some technical issues could use a bit more finesse, although your overall results are definitely in the ballpark.

Project: Light
Take head-and-shoulders shots of one adult human subject in the four types of light (front, side, back and shade).
Grade: A
Instructor's Comments: Melody - Great choice of modeling and handling of her position with respect to the background - Superb job all around!

Project: Fill Flash
Take a head shot of a person outdoors in bright sun, with part of the face in deep shadow. Take a second shot, using your camera's flash to lighten the shadows. Then take the original (with the dark shadows) into Photoshop and use the Shadow/Highlight feature to lighten the shadows. 
Grade: C-
Presentation is quite good!
Instructor's Comments: Your corrections here aren't having the right effect because you started out with soft lighting, not contrasty lighting as the assignment calls for. Your flash does have a nice effect but its very very subtle. You need to start with strong direct sun; check the samples again. Then your corrections will be much more meaningful.

On the Fill Flash assignment I didn't expect a good grade at all. I wasn't prepared for it. I had forgotten to take the pictures that week thinking that the project wasn't due for another week. I remembered I had these pictures on my home computer and knew they would sort of work. At least I would have something to turn in then I could redo the project and still get full credit. (If you turn it in late you can't get full credit for it. But if you turn it in on time you can redo it and he will take the better of the two grades) I called Hubby and asked him to email me the pictures. I plan to redo it this week and hopefully get a better grade. 

Thursday, October 6, 2011

Riverside National Veteran's Cemetary

I'm going to warn you now - This post if going to be FULL of pictures. 
After I got a B on my composition project I decided I was going to redo it. One of the critiques I got was a lack of emotion so I decided I was going to make sure to capture emotion this time. Plus I had always wanted to take pictures here. I dropped the twins off at their preschool and drove over to the Riverside National Veterans Cemetery.  
My first stop was my Mother-in-Law's grave site. She passed away 6 months after Hubby and I got married.  I don't go over there anywhere near as often as I would like even though it's only about 10 minutes from our house. I had to call Hubby when I got there to find out where her grave was. I knew the general location but not exactly where. After walking around for a little while, two cell phone location pictures sent to Hubby and him going to Google Maps, it turns out I was in the right spot I just needed to turn around and walk down one row. She was an amazing woman and I am sad I didn't get much time to get to know her. Its also really hard for me because my children never got to meet their grandma. My littlest is a redhead just like her grandma and from what I've been told has the same spunk she had. (We're in for a wild ride with her ;) )
9:01am
ISO 1600 F-stop 18.0 Shutter speed 1/500
Focal length:43.0mm Subject distance: (no joke this is actually what my Metadata said) Infinity

After getting some pictures at her grave site. I wandered around the cemetery and found this POW/MIA memorial. I had never seen this memorial before and was in awe just standing near it.
9:15am
ISO 200 F-stop 11.0 Shutter Speed 1/250 
Focal Length: 24.0mm Subject distance: again Infinity(I'm going to have to do some research about this. I'm not sure why it says Infinity)

Next to the memorial was the POW/MIA flag
9:22
ISO200 F-stop 11.0 Shutter Speed 1/250
Focal Length: 46.0mm Subject Distant: No Data 

This is a close up of one of the pillars
9:19am
ISO: 200 F-stop 8.0 Shutter Speed 1/100 Exposure -0.33
Focal Length: 45.0mm Subject Distance: No Data
This one was a little underexposed so I went to Photoshop and adjusted the curves to darken the image. 

I continued walking around the cemetery and saw this plaque. 
9:25am
ISO 200 F-stop 7.1 Shutter Speed 1/100 Exposure =0.33
Focal Length: 55.0mm Subject Distance: Infinity
This one was also underexposed so I adjusted the curves to darken the image then lowered the saturation of the red/yellow/green

9:25
ISO 200 F-stop 10.0 Shutter Speed 1/200 Exposure +0.33
Focal Length: 55.0mm Subject Distance: No data
I also adjusted the curves on this one to darken this image. 

Back toward the entrance of the cemetery was the Veterans Memorial.
 9:28
ISO 200 F-Stop 8.0 Shutter Speed 1/125 Exposure +0.33
Focal Length: 40.0mm Subject Distance 3.5m
I wasn't happy with the lighting on this one either so I adjusted the curves to again darken the image. 

9:27
ISO 200 F-Stop 10.0 Shutter Speed 1/200 Exposure +0.33
Focal Length: 53.0 mm Subject Distance 3.5m


9:30
ISO 100 F-Stop 8.0 Shutter Speed 1/100 Exposure +1
Focal Length: 40.0mm Subject Distance: Infinity
I may go back and darken this image a little as well. I haven't decided yet. 

I have such gratitude for the men and women who died for our freedoms. 

GOD BLESS AMERICA

Tuesday, October 4, 2011

Photography Class

I am really loving this photography class. I am learning so much! Plus today the instructor showed 17 different projects that some of the students in our class have turned in and 2 of mine were included!!! It made me feel really good that he selected 2 of mine to show!
This was the first project I turned in. 
COMPOSITION
Critique:
Grade - B
Trees on Hill - Image has moderate impact
Welcome/Marbles - Image has moderate impact
Instructor's Comments: Melody - You are on track with identifying the techniques; I would just suggest beginning, also, to look for feeling and emotion in your image-making. You stick a bit too strictly to documenting (the tree); and also allow the signage to take over the marbles. (Any time there's a word in your photo it's going to grab a lot of attention.) So, keep pushing it along. 


Second Project 
(he selected this one to show to the class)
Grade: A
MACRO
Image has strong impact (like a rifle shot, eh?)
Instructor's Comments: Melody - A nicely-crafted image and presentation as well. I like that you tried out several different macro ideas before settling in with one as the best of the batch. That almost always leads to better shots...Kudos!

Third Project
(he selected this one to show to the class)
ELECTRIC COLOR
Grade: A
Image has strong impact
Color plays a significant role
Instructor's Comments: Melody - Color's too powerful to get anything but an "A"!! Terrific job with the lighting, especially those explosions behind the glasses. The one thing I'd like to see added is just one single slice of another color - orange perhaps - to give us some relief from all that green. Nevertheless, a very well-crafted shot overall. Kudos!


 COMPOSITION REDO
Grade: A-
Memorial- Image has strong impact
Flag at half-staff - Image has moderate impact
Instructor's Comments: Melody - Good second effort. The memorial shows an effective use of "formal" composition - central main subject, balanced by equal left - and - right additional elements. Flag is more interesting because of what it symbolizes. Presentation is good but my recommendation is always to coordinate backgrounds, gradients, etc., with colors that in the images. We'll learn more about this later in the semester.

With the two projects he showed. I had to explain how I set up the shots and what I did to create the look. Our next project is DEPTH OF FIELD and I'm really excited about this one. I'll post some of my shots as I work on it this week. Then I'll post the final project on Tuesday when it's due. 

Monday, October 3, 2011

Don't Quit

 When I first started with photography many eons ago 4 months ago, I thought I wasn't half bad (in Auto Mode). I knew I wasn't GREAT but I thought I was pretty ok. I was talking to my brother in law to gets some tips and information on how to improve. He told me that once I start leaning I will HATE all of my pictures for awhile. He said he took 10,000 pictures before he started liking them. He knew it was 10,000 because he kept track. I thought I know he's probably pretty right. He's a really smart guy. He knows what he's talking about but he learning how to take pictures by trial and error, I was taking classes so of course I wouldn't have to go through 10,000 pictures that I hated first, right? WRONG.

As I have been learning more and more and practicing more I am realizing how little I really know. Don't get me wrong there are some pictures that I've taken that I really like but there are so many more that I've HATED. I'm really working hard on improving and learning all that I can. I don't want to leave my house without my camera now and when I do I usually end up regretting it. The hardest part is not quitting when things get hard or when I get discouraged. That has always been my biggest challenge. I am a pro at quitting when things get tough. (Not something that I'm proud of) The strange part with photography is, even though I have the urge to quit, it's overwhelmed by the urge to keep going. Ultimately I really don't want to stop. I want to learn and get better. I'm not sure where exactly I want to take this but I know I don't want to quit. Lately I've been focusing mainly on schoolwork. I'm taking a photography class and an Adobe photo shop class. I'm really enjoying them and I'm learning a TON!! Here are some of my photographs for school